You can restore, re-add, or purge tables and columns that are in an invalid state. You can either perform these actions individually while re-adding tables and columns or manage them in bulk through the Deleted Tables and Columns option.
Tables
To restore or re-add a table, follow these steps:
- Go to Application Menu > Data Catalog > Metadata Manager > Explore.
- On the Explore tab, click an environment tile to view its details and tables.
- Click Options.
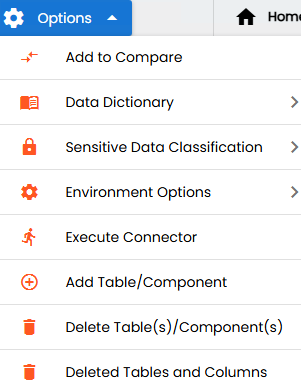
The available options appear.
- Click Add Table/Component.
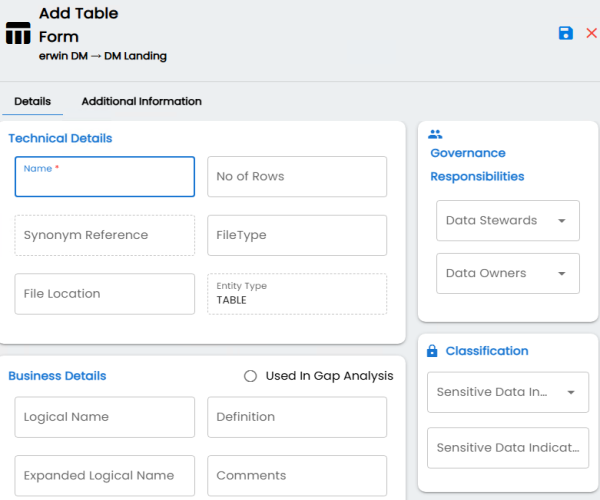
- In the Name box, enter the name of the invalid table.
- Click
 .
. -
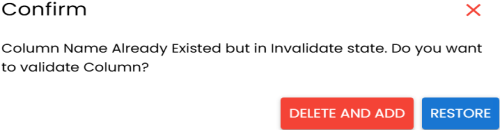
Use the following options:
-
Delete and Add: Use this option to delete an invalid table and add a new one.
-
Restore: Use this option to restore the existing table.
The Add Table Form page appears.
A Confirm pop-up appears.

To restore or purge the tables in bulk, follow these steps:
- Go to Application Menu > Data Catalog > Metadata Manager > Explore.
- On the Explore tab, click an environment tile to view its details and tables.
- Click Options.
The available options appear. - Click Deleted Tables and Columns.
- On the Tables tab, select the required tables, and then use the following options:
Restore: Use this option to restore the selected tables.
Purge: Use this option to delete the selected tables from the database permanently .
The Deleted Tables and Columns page appears.

Columns
To restore or re-add columns, follow these steps:
- Go to Application Menu > Data Catalog > Metadata Manager > Explore.
- On the Explore tab, click an environment tile to view its details and tables.
- In the Data Catalog pane, click a table to see its columns.
- Click Options.
- Click Add Column/Field.
-
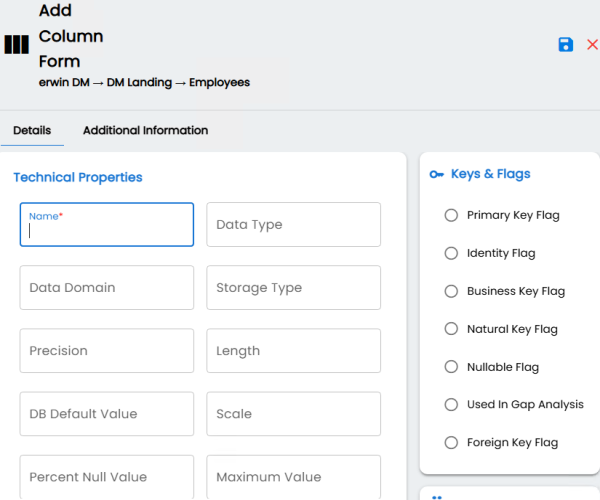
In the Name box, enter the name of the invalid column.
-
Click
.A Confirm pop-up appears.
-
Use the following options:
Delete and Add: Use this option to delete the invalid column and add a new one.
Restore: Use this option to restore the existing column.
The available options appear.

The Add Column Form page appears.
To restore or purge the columns in bulk, follow these steps:
- Go to Application Menu > Data Catalog > Metadata Manager > Explore.
- On the Explore tab, click an environment tile to view its details and tables.
- Click Options.
The available options appear. - Click Deleted Tables and Columns.
- Click the Columns tab.
- Select the required columns, and use the following options:
The Deleted Tables and Columns page appears.
-
Restore: Use this option to restore the selected columns.
-
Purge: Use this option to delete the selected columns from the database permanently.